

Fluids your car needs and when to change them

Maintaining your vehicle’s fluids is crucial for ensuring optimal performance and longevity. Among the essential fluids that require regular attention are coolant and oil, both of which play pivotal roles in keeping your car running smoothly. Neglecting these fluids can lead to serious engine damage and costly repairs, making it vital to adhere to a proper maintenance schedule.
Coolant is responsible for regulating engine temperature, preventing overheating, and protecting against corrosion. It’s essential to check the coolant level regularly and replace it according to the manufacturer’s recommendations. This not only helps in maintaining the engine’s efficiency but also extends the life of radiator components.
Meanwhile, oil lubricates engine parts, reduces friction, and assists in heat dissipation. The oil should be changed based on mileage and time intervals specified in your vehicle’s manual. Regular oil changes ensure that your engine runs smoothly and efficiently, as well as eliminating sludge and harmful particles that can accumulate over time.
This guide provides you with a detailed schedule for maintaining these vital fluids and tips for replacement, ensuring that your vehicle remains in peak condition throughout its lifespan.
How to Determine the Right Coolant Replacement Interval
Determining the right coolant replacement interval is essential for maintaining your motor’s optimal performance and longevity. Coolant, also known as antifreeze, serves multiple functions including regulating engine temperature, preventing corrosion, and protecting against freezing and boiling. Over time, coolant can become less effective due to chemical breakdown and contamination.
To establish the appropriate replacement interval, consult your vehicle manufacturer’s guidelines. Most manufacturers recommend coolant replacement every 30,000 to 60,000 miles, but this can vary based on the type of coolant used and driving conditions.
The type of coolant is imperative in determining the replacement schedule. Traditional green coolant generally needs more frequent changes compared to extended life coolants, which can last up to 150,000 miles. Always check for specific recommendations based on the coolant formulation, whether it is inorganic additive technology (IAT), organic additive technology (OAT), or hybrid organic acid technology (HOAT).
Monitor the condition of the coolant regularly. Signs of contamination, such as oil layers on the surface, discoloration, or a foul smell, indicate that it is time for a replacement regardless of mileage. Additionally, perform periodic testing of the coolant’s pH level and freeze protection to ensure it remains within a safe range.
Consider your driving habits as well. Frequent short trips, heavy towing, or extreme temperatures may demand more regular coolant changes. Consult with a professional mechanic if you are unsure, as they can offer insight tailored to your motor and usage patterns.
In conclusion, the right coolant replacement interval is determined by manufacturer recommendations, type of coolant, condition checks, and driving conditions. Regular maintenance ensures your motor operates efficiently and prolongs its lifespan.
Identifying Signs of Deteriorating Motor Oil
Motor oil is crucial for the smooth operation of an engine, and recognizing its degradation can prevent significant damage. Here are key signs that indicate your motor oil may be deteriorating:
- Change in Color: Fresh oil is typically a golden or amber color. If the oil becomes dark brown or black, it may indicate contamination or that it needs replacement.
- Unusual Texture: Oil should be smooth and free of particles. If the oil feels gritty or has sediment when you check it, this could be a sign of significant deterioration.
- Burning Smell: A burnt odor can indicate that the oil has broken down and is no longer effective. This can lead to overheating and increased friction within the engine.
- Presence of Foam: If you notice foam on the dipstick or in the oil filler cap, it may indicate contamination, possibly from coolant or water infiltrating the oil.
- Increased Engine Noise: If you hear more knocking or tapping sounds from the engine, it may be due to insufficient lubrication from degraded oil.
Regular oil checks are essential for maintaining engine health. If you suspect your motor oil has deteriorated, consider replacing it immediately to avoid further complications.
Additionally, keep an eye on the oil condition and be mindful of any changes in engine performance. Routine maintenance is critical to ensure both the oil and the engine run smoothly, protecting them from issues related to coolant contamination and other foreign substances.
Step-by-Step Guide to Flushing Coolant and Changing Oil
Flushing your vehicle’s coolant and changing the oil are essential tasks to maintain the efficiency and longevity of your motor. Follow this step-by-step guide to ensure proper execution of both processes.
Flushing Coolant
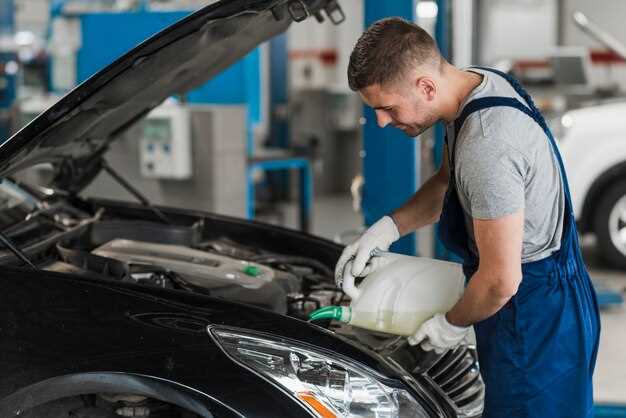
1. Begin by ensuring your vehicle is parked on a level surface and the engine is cool. Open the hood and locate the coolant reservoir and radiator cap.
2. Place a container under the radiator to catch the old coolant. Remove the radiator cap carefully, and then release the drain valve at the bottom of the radiator to let the old coolant flow into the container.
3. Once the radiator is empty, close the drain valve. Fill the radiator with distilled water, and reinstall the radiator cap. Start the engine and let it run for about 10 minutes. This helps flush out any residual old coolant.
4. Turn off the engine and allow it to cool down again. Repeat the draining process to remove the flushed water and contaminants.
5. After the second draining, add the appropriate amount of new coolant as specified in the owner’s manual. Make sure to mix it with distilled water if required.
6. Start the engine and let it warm up while checking for any leaks. Keep an eye on the coolant level and add more if necessary.
Changing Oil
1. Start by gathering your materials: new oil, an oil filter, an oil catch pan, and necessary tools such as a wrench and an oil filter wrench.
2. Park your vehicle on a level surface and turn off the engine. Allow the oil to cool down if it has been running.
3. Place the oil catch pan under the oil pan’s drain plug. Remove the plug with a wrench and let the old oil drain completely into the pan.
4. While the oil is draining, locate the oil filter. Use the oil filter wrench to remove it. Be prepared for some oil spillage, so make sure the catch pan is positioned correctly.
5. Before installing the new oil filter, apply a small amount of new oil to the rubber gasket on the top of the new filter. Screw the new oil filter in place until it is snug but do not over-tighten.
6. Once the oil has fully drained, replace the drain plug securely. Refill the engine with new oil using a funnel, ensuring to adhere to the recommended oil grade and capacity found in the owner’s manual.
7. After adding the oil, run the engine for a few minutes. Check for leaks around the oil filter and the drain plug. Turn off the engine and check the oil level using the dipstick, adding more oil if needed.
By following these steps for flushing the coolant and changing the oil, you will help ensure your motor operates smoothly and efficiently.